Last week I mentioned how I'd like to try my hand at making a bookmark. I was mostly inspired by
this blog post. Today, I got my craft tools out, and man was it fun to get back to diy!
Things needed:
1. Paper (preferably 200 gsm): I used 130, which wasn't the best idea, but works.
2. Sketching tools, i.e pencil, eraser, marker, etc.
3. Cutting tools, i.e scissors, paper cutter
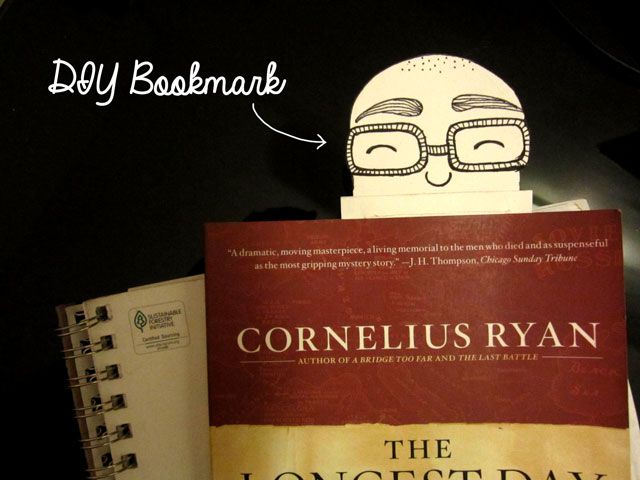
Before getting to work, it's good to have an idea in mind. I thought of a person reading a book, and went from there.
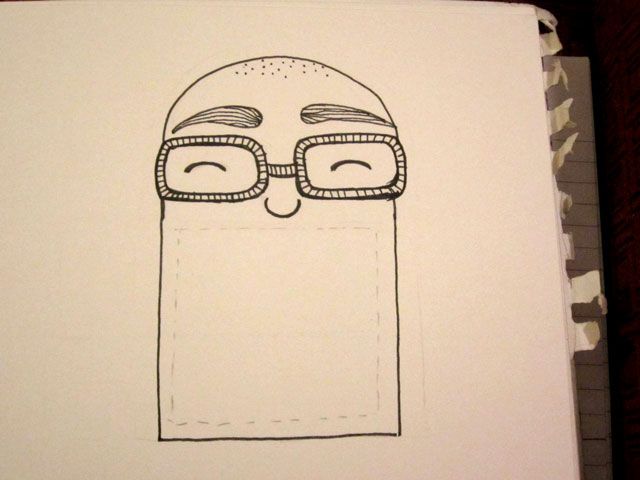
1. Sketch out your basic idea. The top part of the sketch will peek out of the book, and the rest will be hidden, so keep that in mind. Also, if you're like me, and hate marks on pages, it's best to keep the doodle to the top part of the paper, just as a precaution.
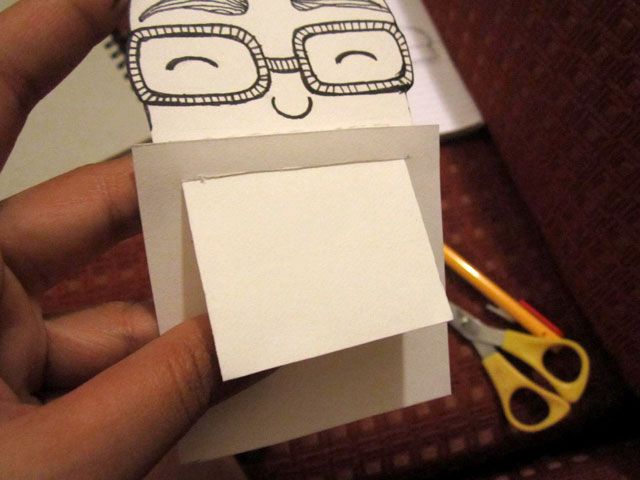
2. Cut out your sketch. The inner dashed square will be cut on three sides, so that it forms a flap that can hold pages of a book. It is attached to another piece of paper (which is a simple rectangle in my case, but feel free to go crazy), that forms the back of the flap.
3. Cut the sides of the second piece of paper to make it more compact. As an added measure, you can glue the back of the doodle paper to the rectangle. Wait a while before using it as a bookmark, just to make sure the ink and glue have dried completely.
The bookmark works well for me, and won't damage the pages of my book (phew!). In retrospect, I could have made it smaller, but that wouldn't have been as much fun to cut out. I named this guy Dwayne, and after reading The Longest Day, he's moved on to a Margaret Atwood novel.


Comments
Post a Comment
Thanks for stopping by! :)